| Version 16 (modified by , 5 years ago) ( diff ) |
|---|
For the translation of Haiku's user guide, an online tool has been developed to keep track of the progress of every language and to ensure all pages are in sync with the original English version. The translating itself is also done with it, online.
The translations of the user guide need constant attention. It's not only translations to new languages, but also keeping everything up-to-date.
Index
- Help with translations
- Starting a new translation
- The online translation tool
- Quick Tour localization
Help with translations
If you have a good grasp of the English language and enough knowledge of HTML to recognize what's a tag (<i>,<b> etc.) and what's translatable contents, here is how to get involved:
Have a look at the translation rules and styles in the wiki of the specific language.
Subscribe to the localisation mailing list (message archive) and the language-specific haiku-i18n-* discussion list and introduce yourself. The respective "Language Manager" will provide you with login information for the online translation tool after your application has been discussed/voted on by the other volunteers. You may have to do a few sample block translations handed to you by your Language Manager.
Starting a new translation
If you would like to start a completely new translation, follow these steps:
- It's highly recommended to find at least one more dedicated translator. A team increases the chances of completing all pages for a language and keeping them up-to-date in the future. Being able to discuss difficult passages increases the quality and frankly, working together with others is more fun. To find other translators, try posting to the web forum and the Haiku mailing list.
- Subscribe to the localization mailing list (message archive) and introduce yourselves.
- We can set up a new haiku-i18n-?? mailing list where you can discuss:
- Who will be the "Language Manager" who will monitor the mailing lists and welcomes newcomers, hands them sample blocks to test their skills, calls for votes, creates translator accounts at the translation website, and updates the wiki according to what's been discussed. Esp. in the beginning, the Language Manager should read through the work of newcomers and suggest improvements to guarantee a certain consistency.
- Work on a translation guide, defining rules and style of the translation at the wiki. Rule no.1 is "Don't change the HTML formatting of the original texts". Everything else, how the reader is addressed, using active or passive etc. is language specific and therefore totally in your hands.
- Update a list of common terminology and translations in the wiki.
- When the above is done, announce it on the i18n mailing list and the Language Manager receives his account after providing his desired username and email address. He can then create more accounts for "his" translators on-site. Passwords are generated automatically and send via email (check your spam folder!).
The online translation tool
The status page
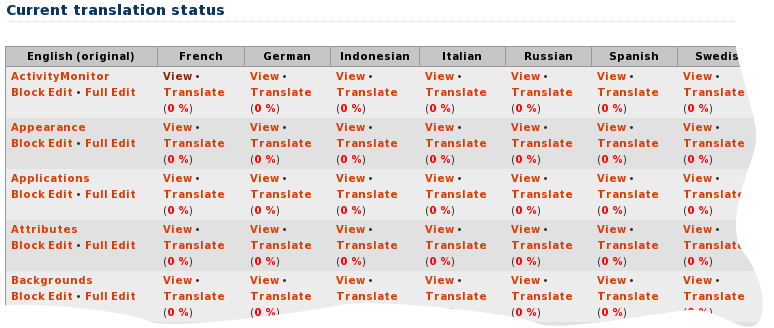
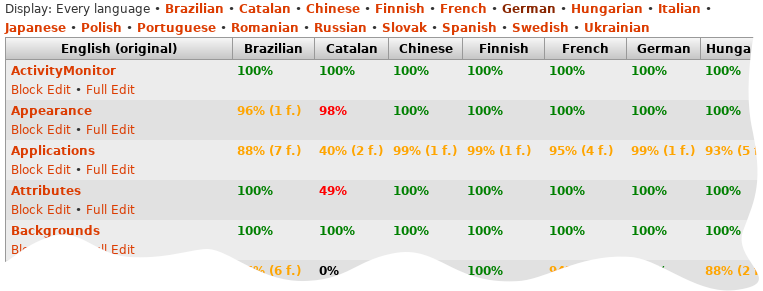
Thanks to a very nice online tool originally written by Vincent Duvert and improved upon since, the translating process is easy as can be. Starting point is the page with the current translation status of all documents.

The first column holds the original English document. It's the basis of all translations: any changes, improvements or completely new pages have to start with the original English text. To edit English pages you need special authoring privileges.
The other columns are for all the different languages. They show the translation status in percent. If the percentage is shown in yellow with e.g. "(2 f.)", that means that 2 blocks are marked as "fuzzy" (see "Translating a page" below).
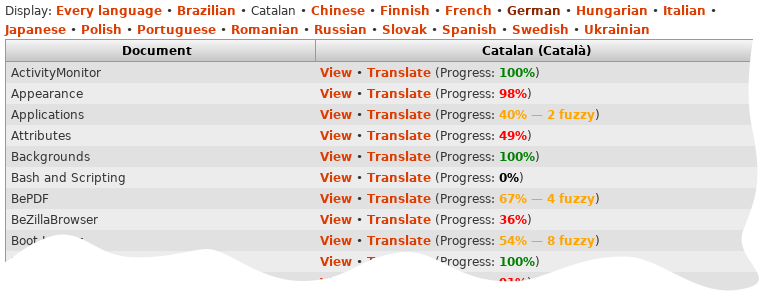
To translate a page, you have to select a language from the links above the table. Here, "Catalan" as example:

You can sort the columns by clicking on its heading, allowing you to quickly show all unfinished pages at the top.
Translating a page
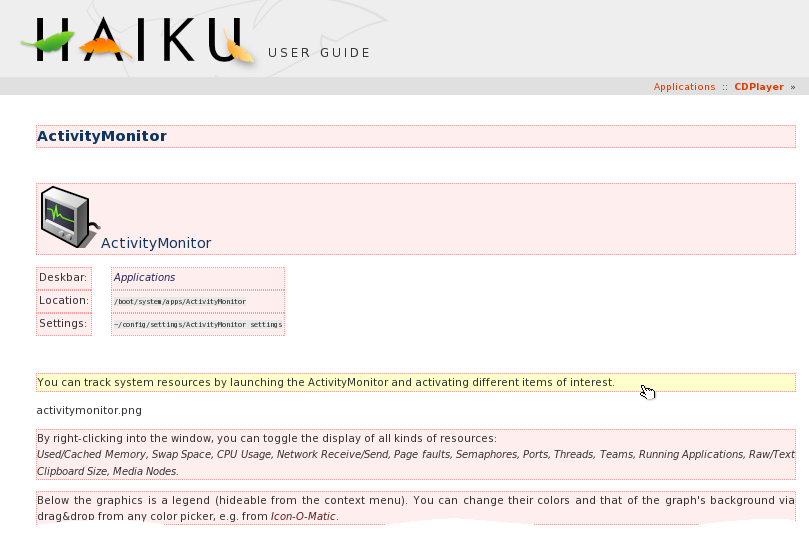
Clicking "Translate" will open the document for translation:

Every translatable block has a red backdrop that lights up when the mouse hovers over it. If the backdrop is yellow instead, it means that the original English text has changed, and the translation has become "fuzzy" (this is also reflected in the percentage-display on the status page). A white backdrop signals that this block has been translated and is in sync with the original English version.
So:
| white: | translated and in sync with the English original. |
| red: | not translated yet. |
| yellow: | "fuzzy", review needed - either the English original has been changed or a translator has set the block as incomplete. |
Translating a block
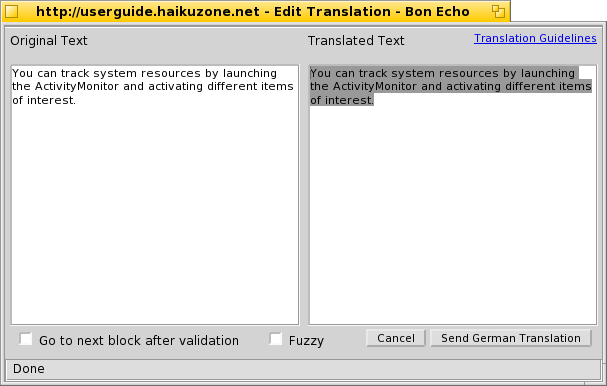
If you click a block, the translation panel opens:

On the left side is the original text, on the right where you work on the translation. There's also a link to language specific style guide and terminology that have to be respected to get a consistent result when several people work together.
When you're satisfied with your text, you use the button "Send {language} Translation" or "Cancel" to abort.
You can activate the checkbox "Go to next block after validation" to quickly translate block after block.
The document window is updated live with your newly created text. That way you can keep checking if there's a smooth transition from one block to the next.
In case you are unsure of a translation, or want to save a partial translation and finish it later, check the "Fuzzy" box before clicking "Send Translation".
This "fuzzy" flag indicates that a translation for a particular block may be imprecise or unfinished, and needs review. When a part of the original English document changes, translations associated to this part are automatically marked as fuzzy, so the translators can easily spot what needs to be updated.
Localizing images
Images of the GUI which contain strings that are translatable and change when you switch to another language with the Locale preferences, can be "translated" by uploading a localized version. Simply click on it and a window pops open to choose the image to transfer to the online tool.
NOTE: Due to a shortcoming of our online tool, images that appear in certain HTML structures, e.g. in <ul> or <ol> lists or in a cell in a table, cannot be exchanged this easily. They have to be uploaded in the admin section of the online tool manually. Please upload these images somewhere (e.g. at postimage.org and post the links to the haiku-i18n mailing list.
When submitting a screenshot, you should make sure that the gist of what it is used to explain is still there in your localized version. You should also make sure to
- use the default Haiku theme in the Appearance preferences, only decrease all font sizes to 10 pt
- keep the same image format (mostly PNG)
- crop precisely, including the grey border that runs around a window
- all background pixels are transparent (Haiku's Screenshot already does that for the area beside the yellow tab, but you may have to edit/compose in WonderBrush. Tip: In WonderBrush, use the Fill or Rectangle tool and set in its Properties the Mode to Erase.)
Quick Tour localization
The Quick Tour is a bit of a special case. Each topic should be short enough to fit on one page in the browser, so we try to keep the text short and the accompanying screenshort small and significant. Keep that in mind when translating and take special care when "re-screenshooting":
- Use Haiku's default GUI settings in the Appearance preferences, but use a font size of 10.
- Some images need to be composited from several screenshots or need to be annotated. Currently the WonderBrush workfiles are found at GitHub. To save potential future work when an image needs updating, localized workfiles can be submitted there.
- The Stack & Tile images are animated GIFs. They were created by uploading the 3 PNGs for each at EasyGif.com. There the GIF is generated with a delay time of 200 (= 2 secs) and the option "Don't stack frames".
Attachments (5)
-
statuspage.png
(29.8 KB
) - added by 15 years ago.
Status page of all documents
-
translatepage.png
(52.1 KB
) - added by 15 years ago.
A page being translated
-
translationpanel.png
(20.8 KB
) - added by 15 years ago.
The translation panel of one block
-
one_language_status.png
(38.6 KB
) - added by 7 years ago.
screenshot of single language table
-
all_languages_status.png
(27.9 KB
) - added by 7 years ago.
screenshot of all language table
Download all attachments as: .zip